Your Team Can Do Better If The Job Is Planned Right
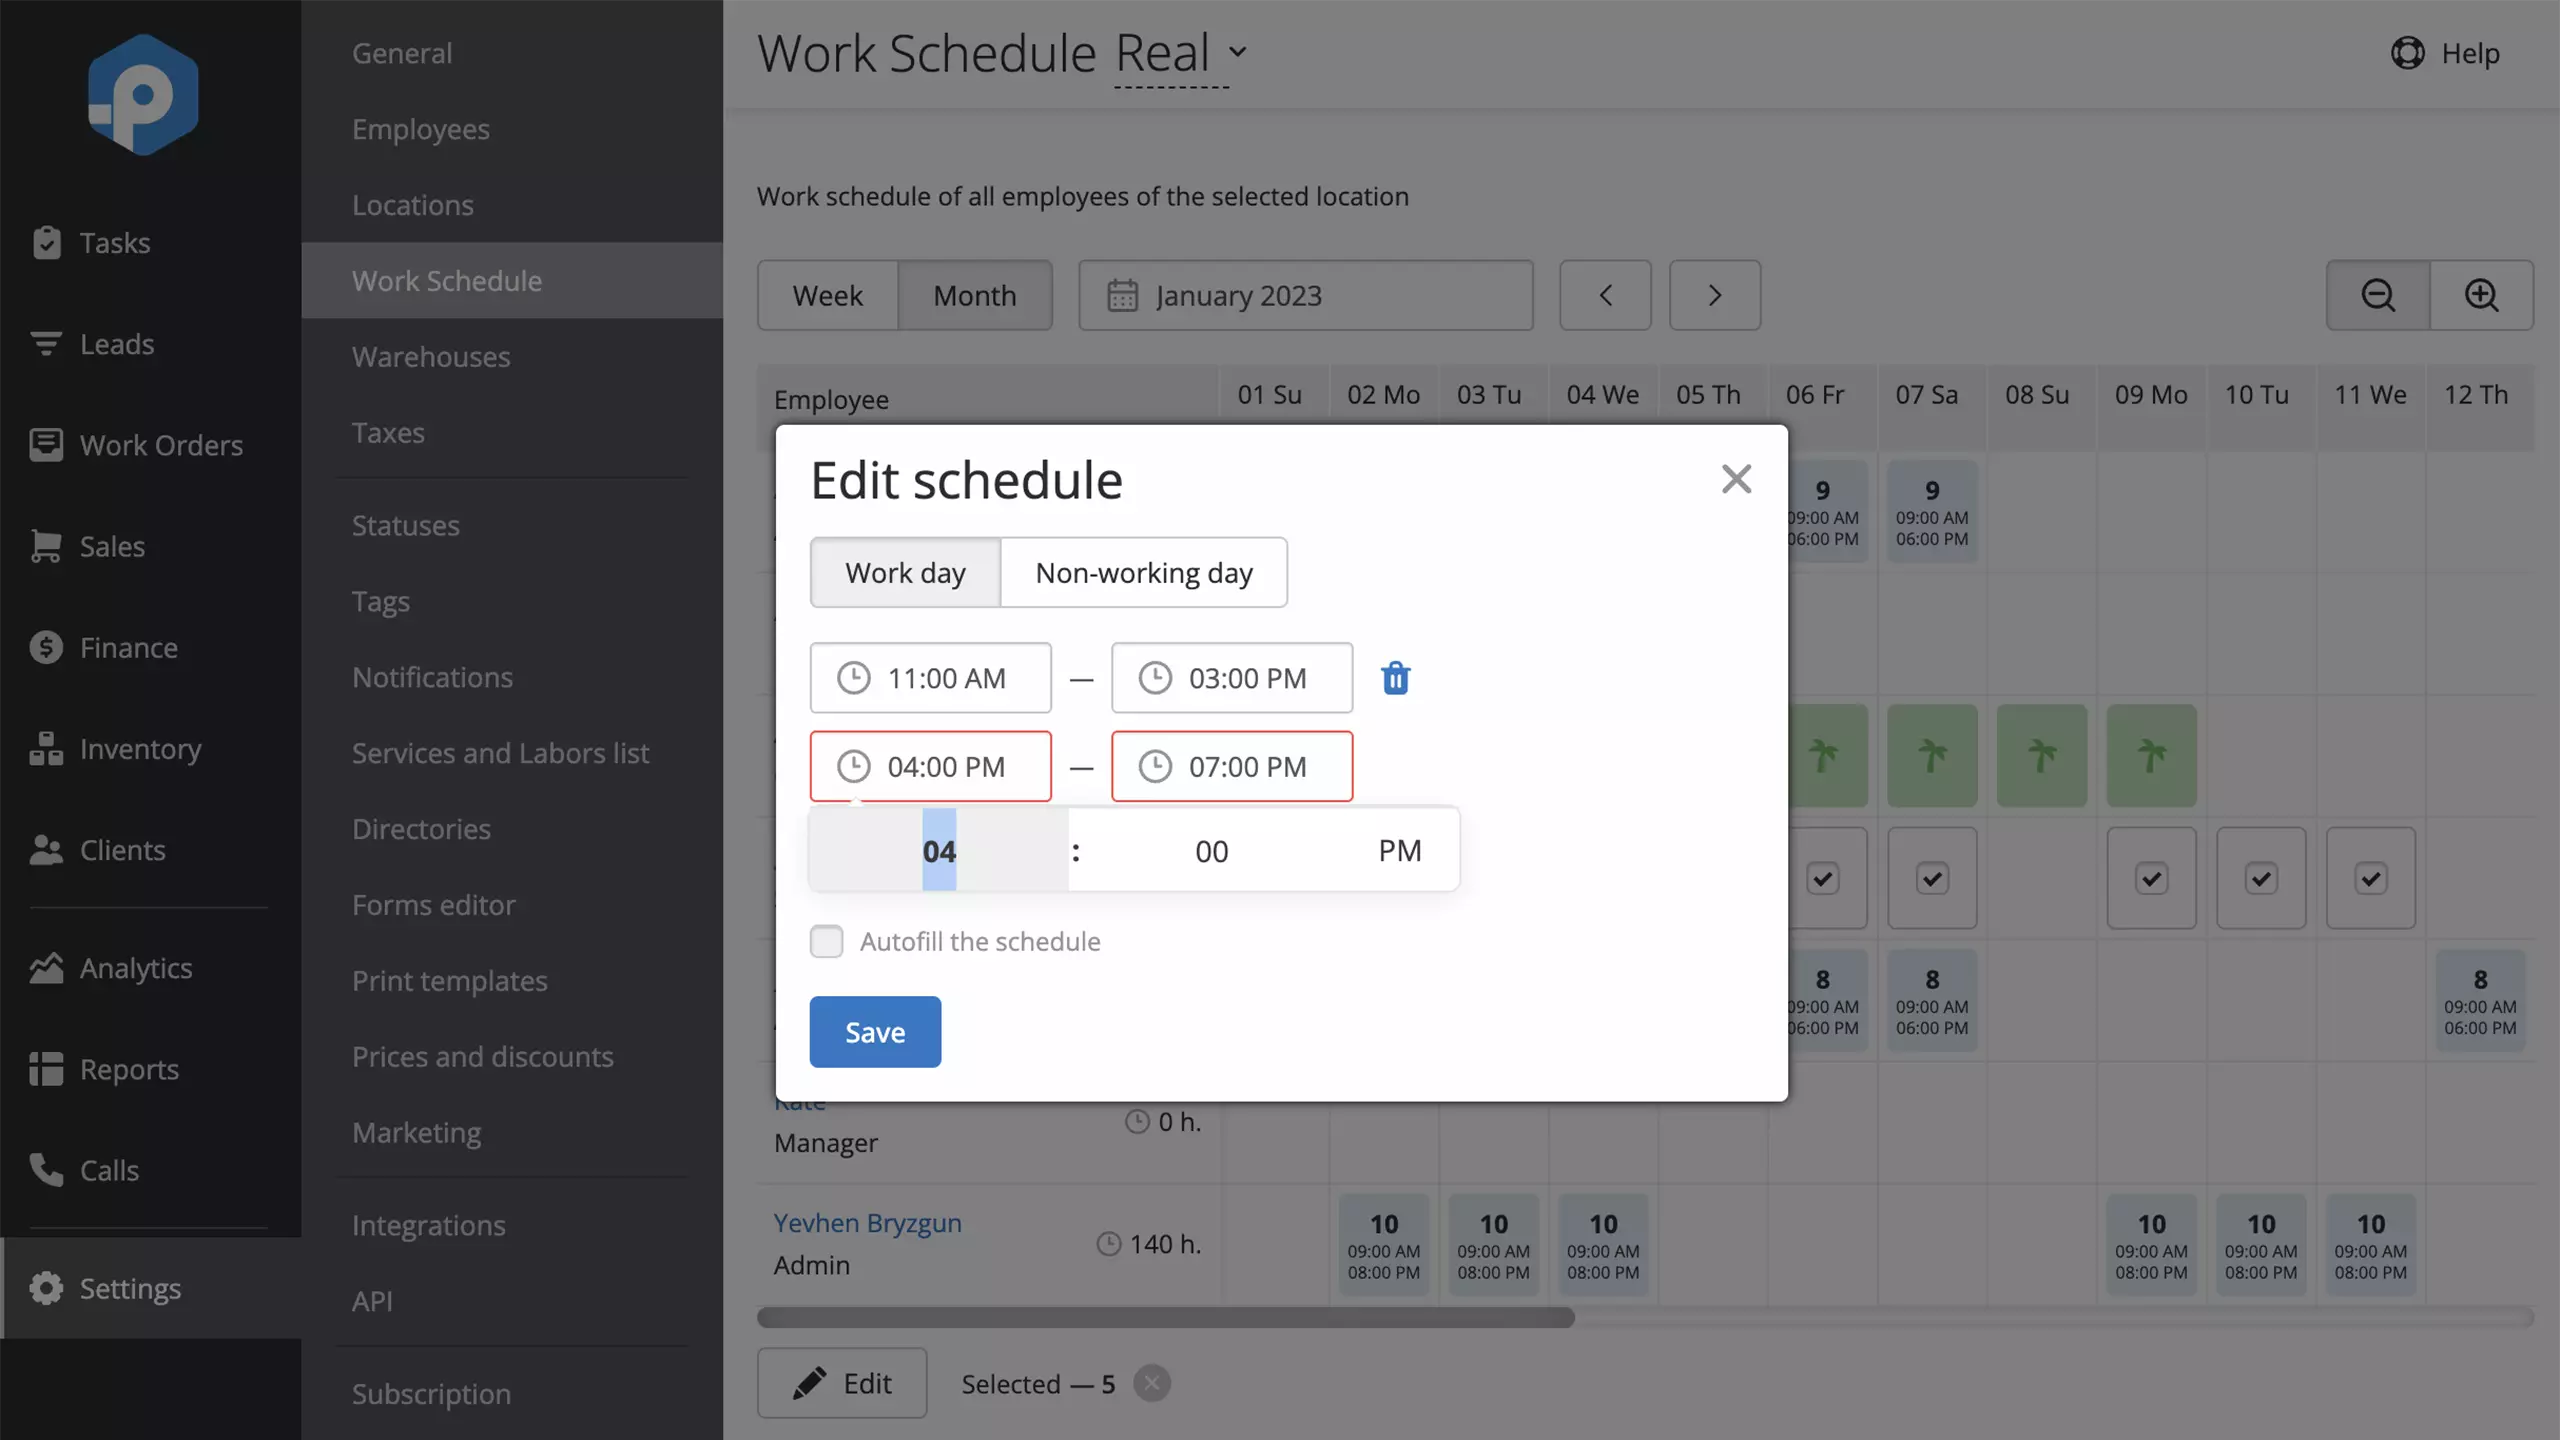
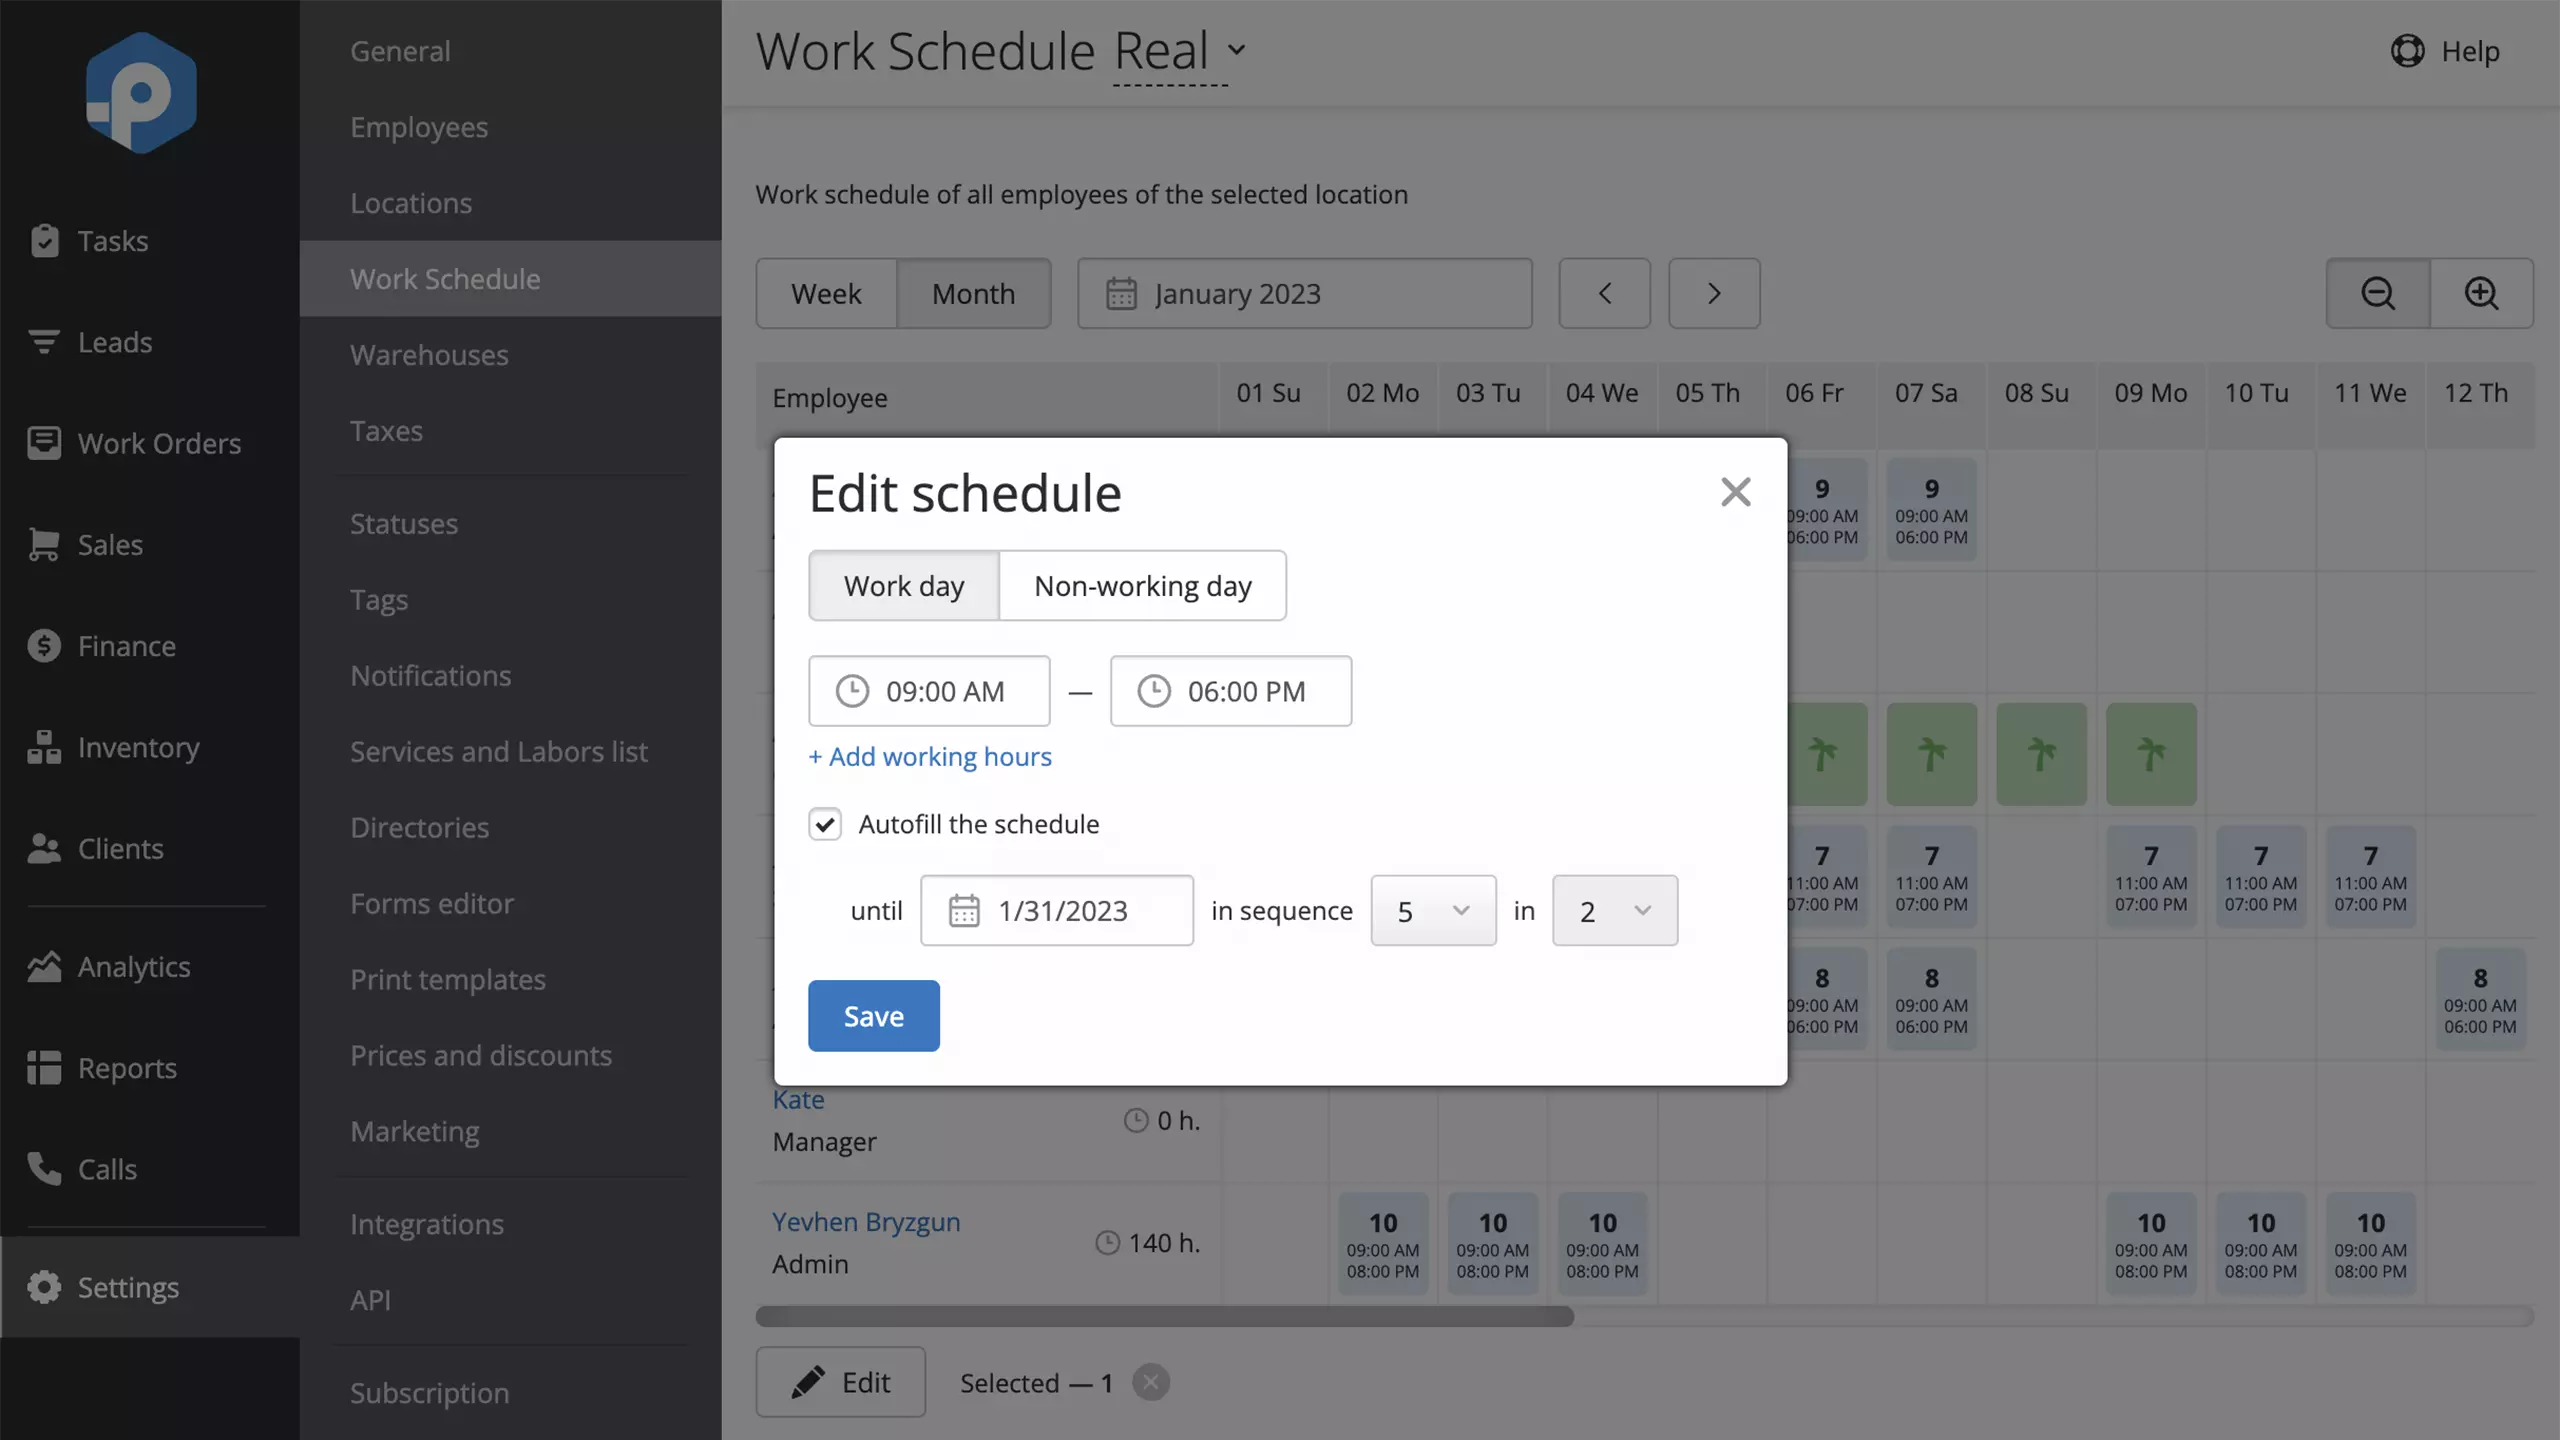
Individual Work Schedules
for Each Location
Scheduling of Customer
Appointments and Call-Outs
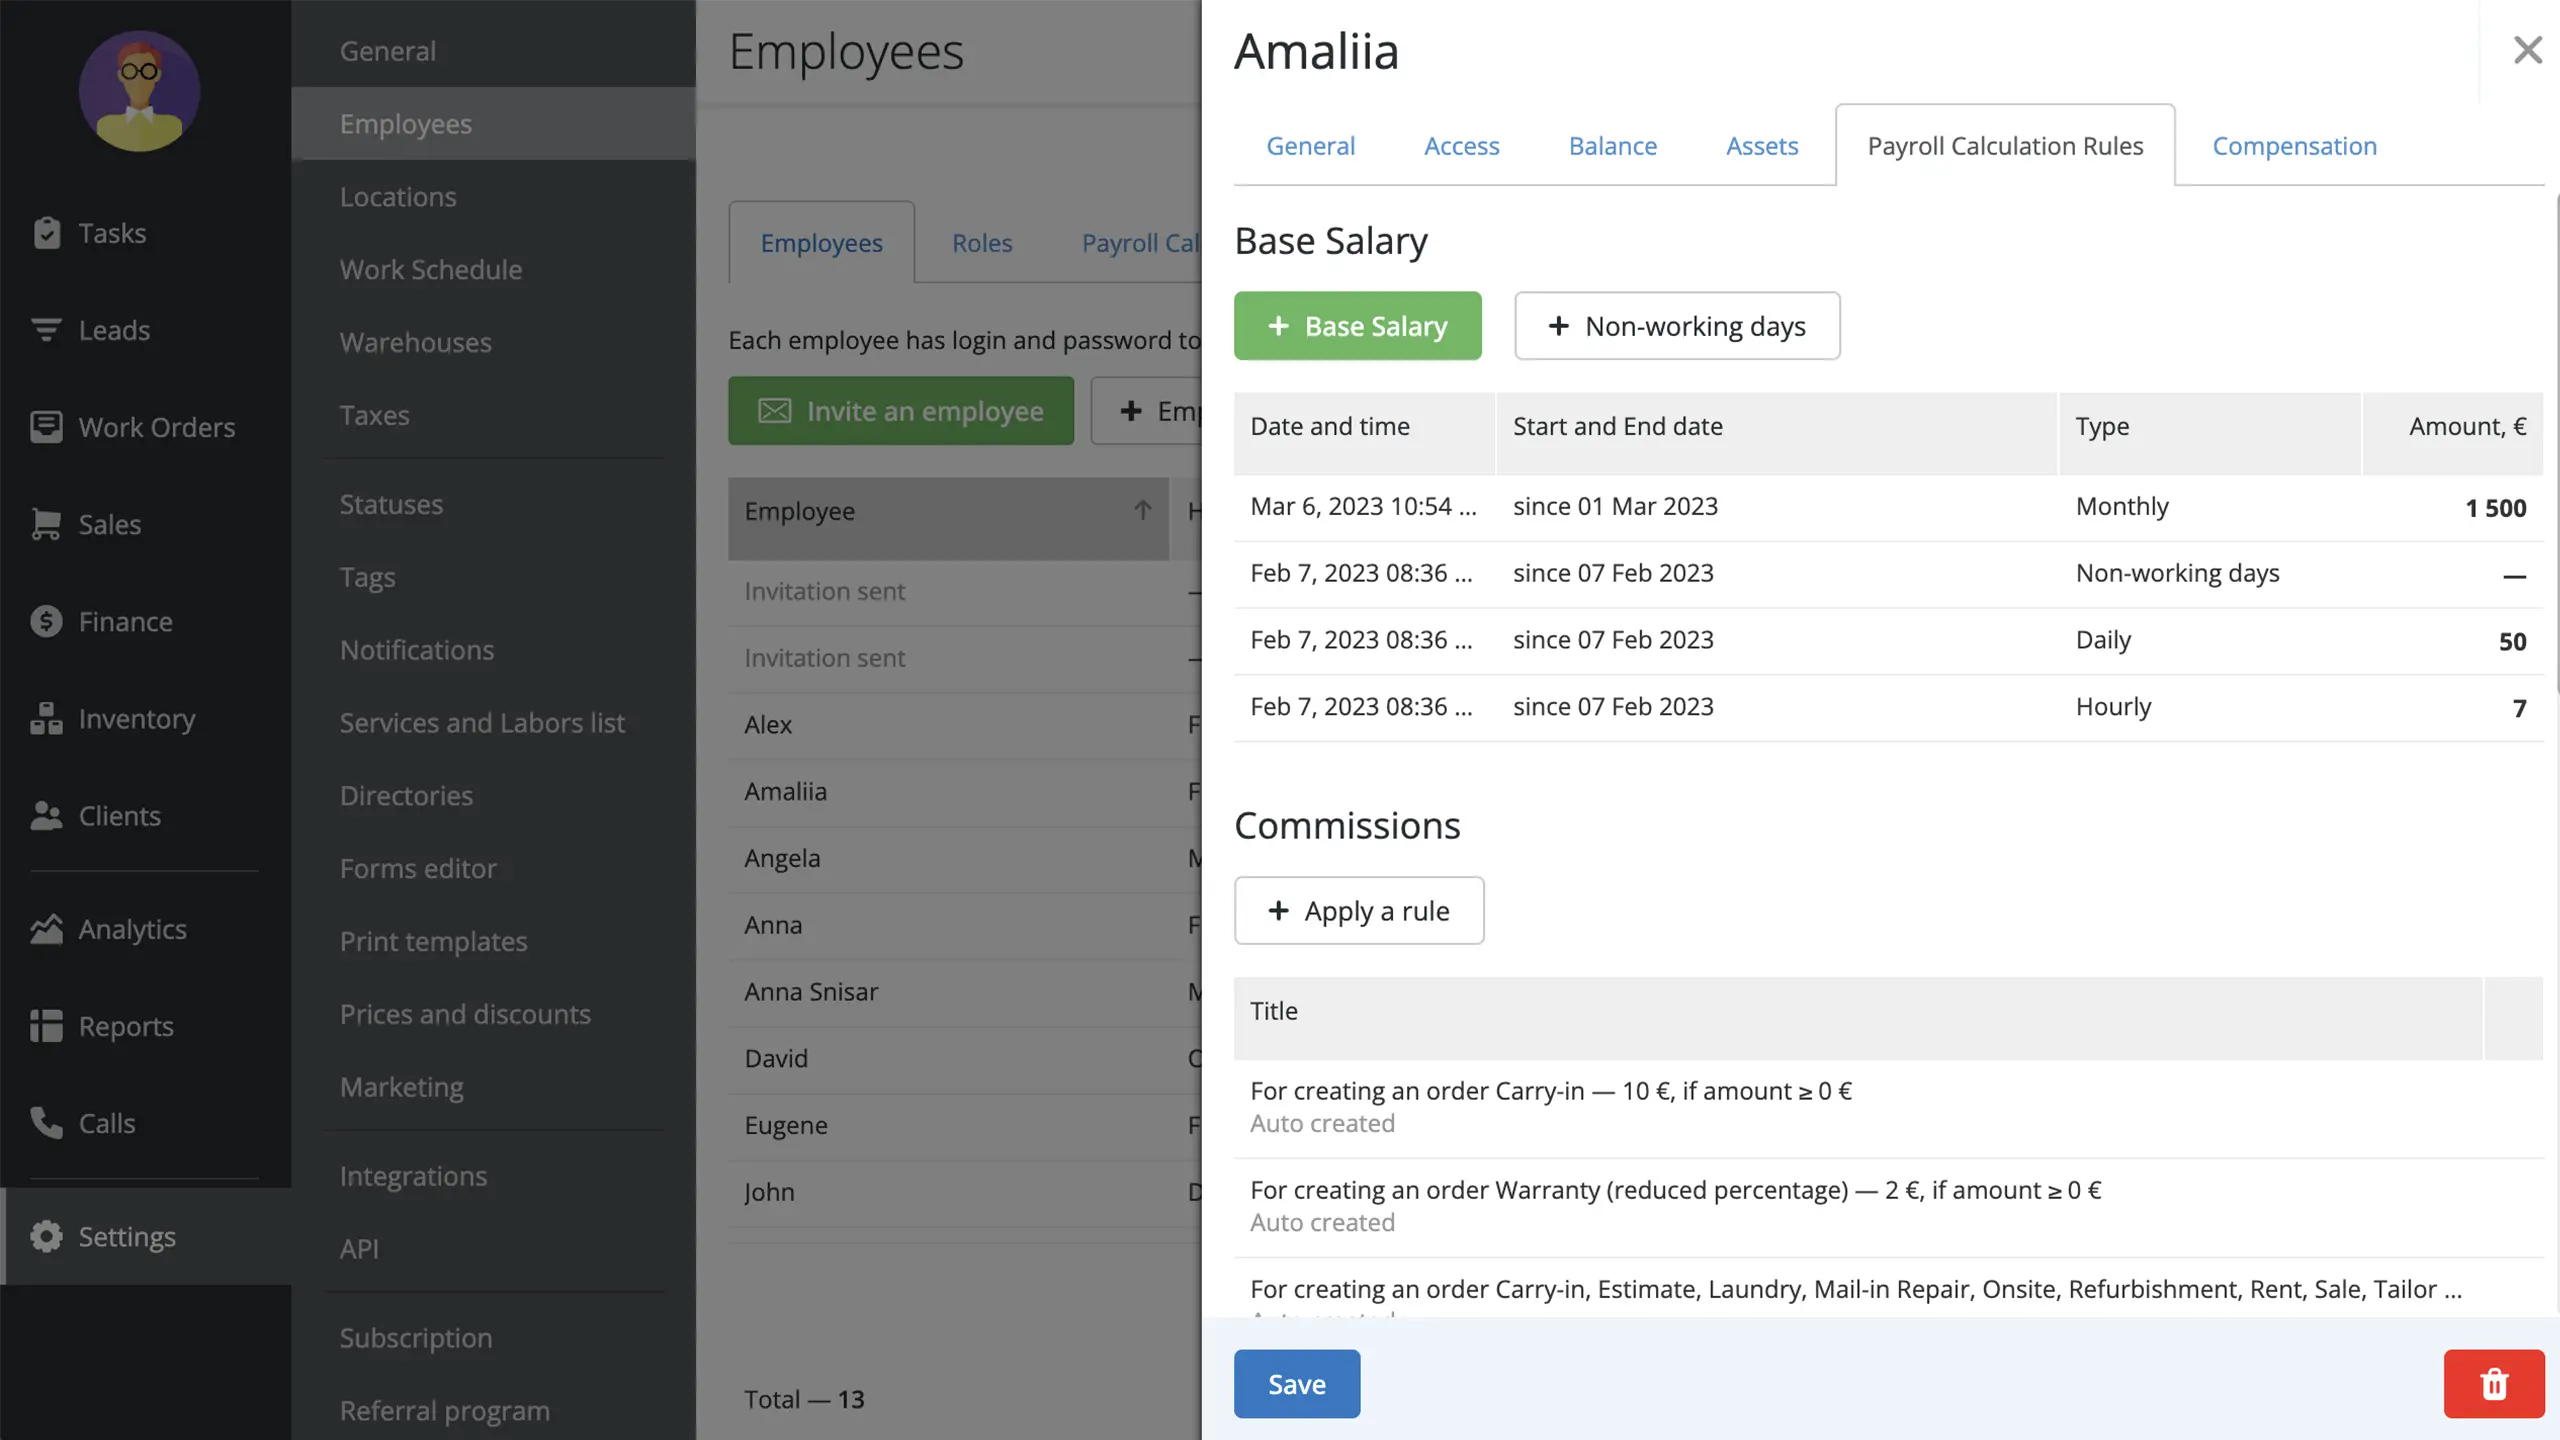
Calculation of Wages Based
on Daily and Hourly Rates
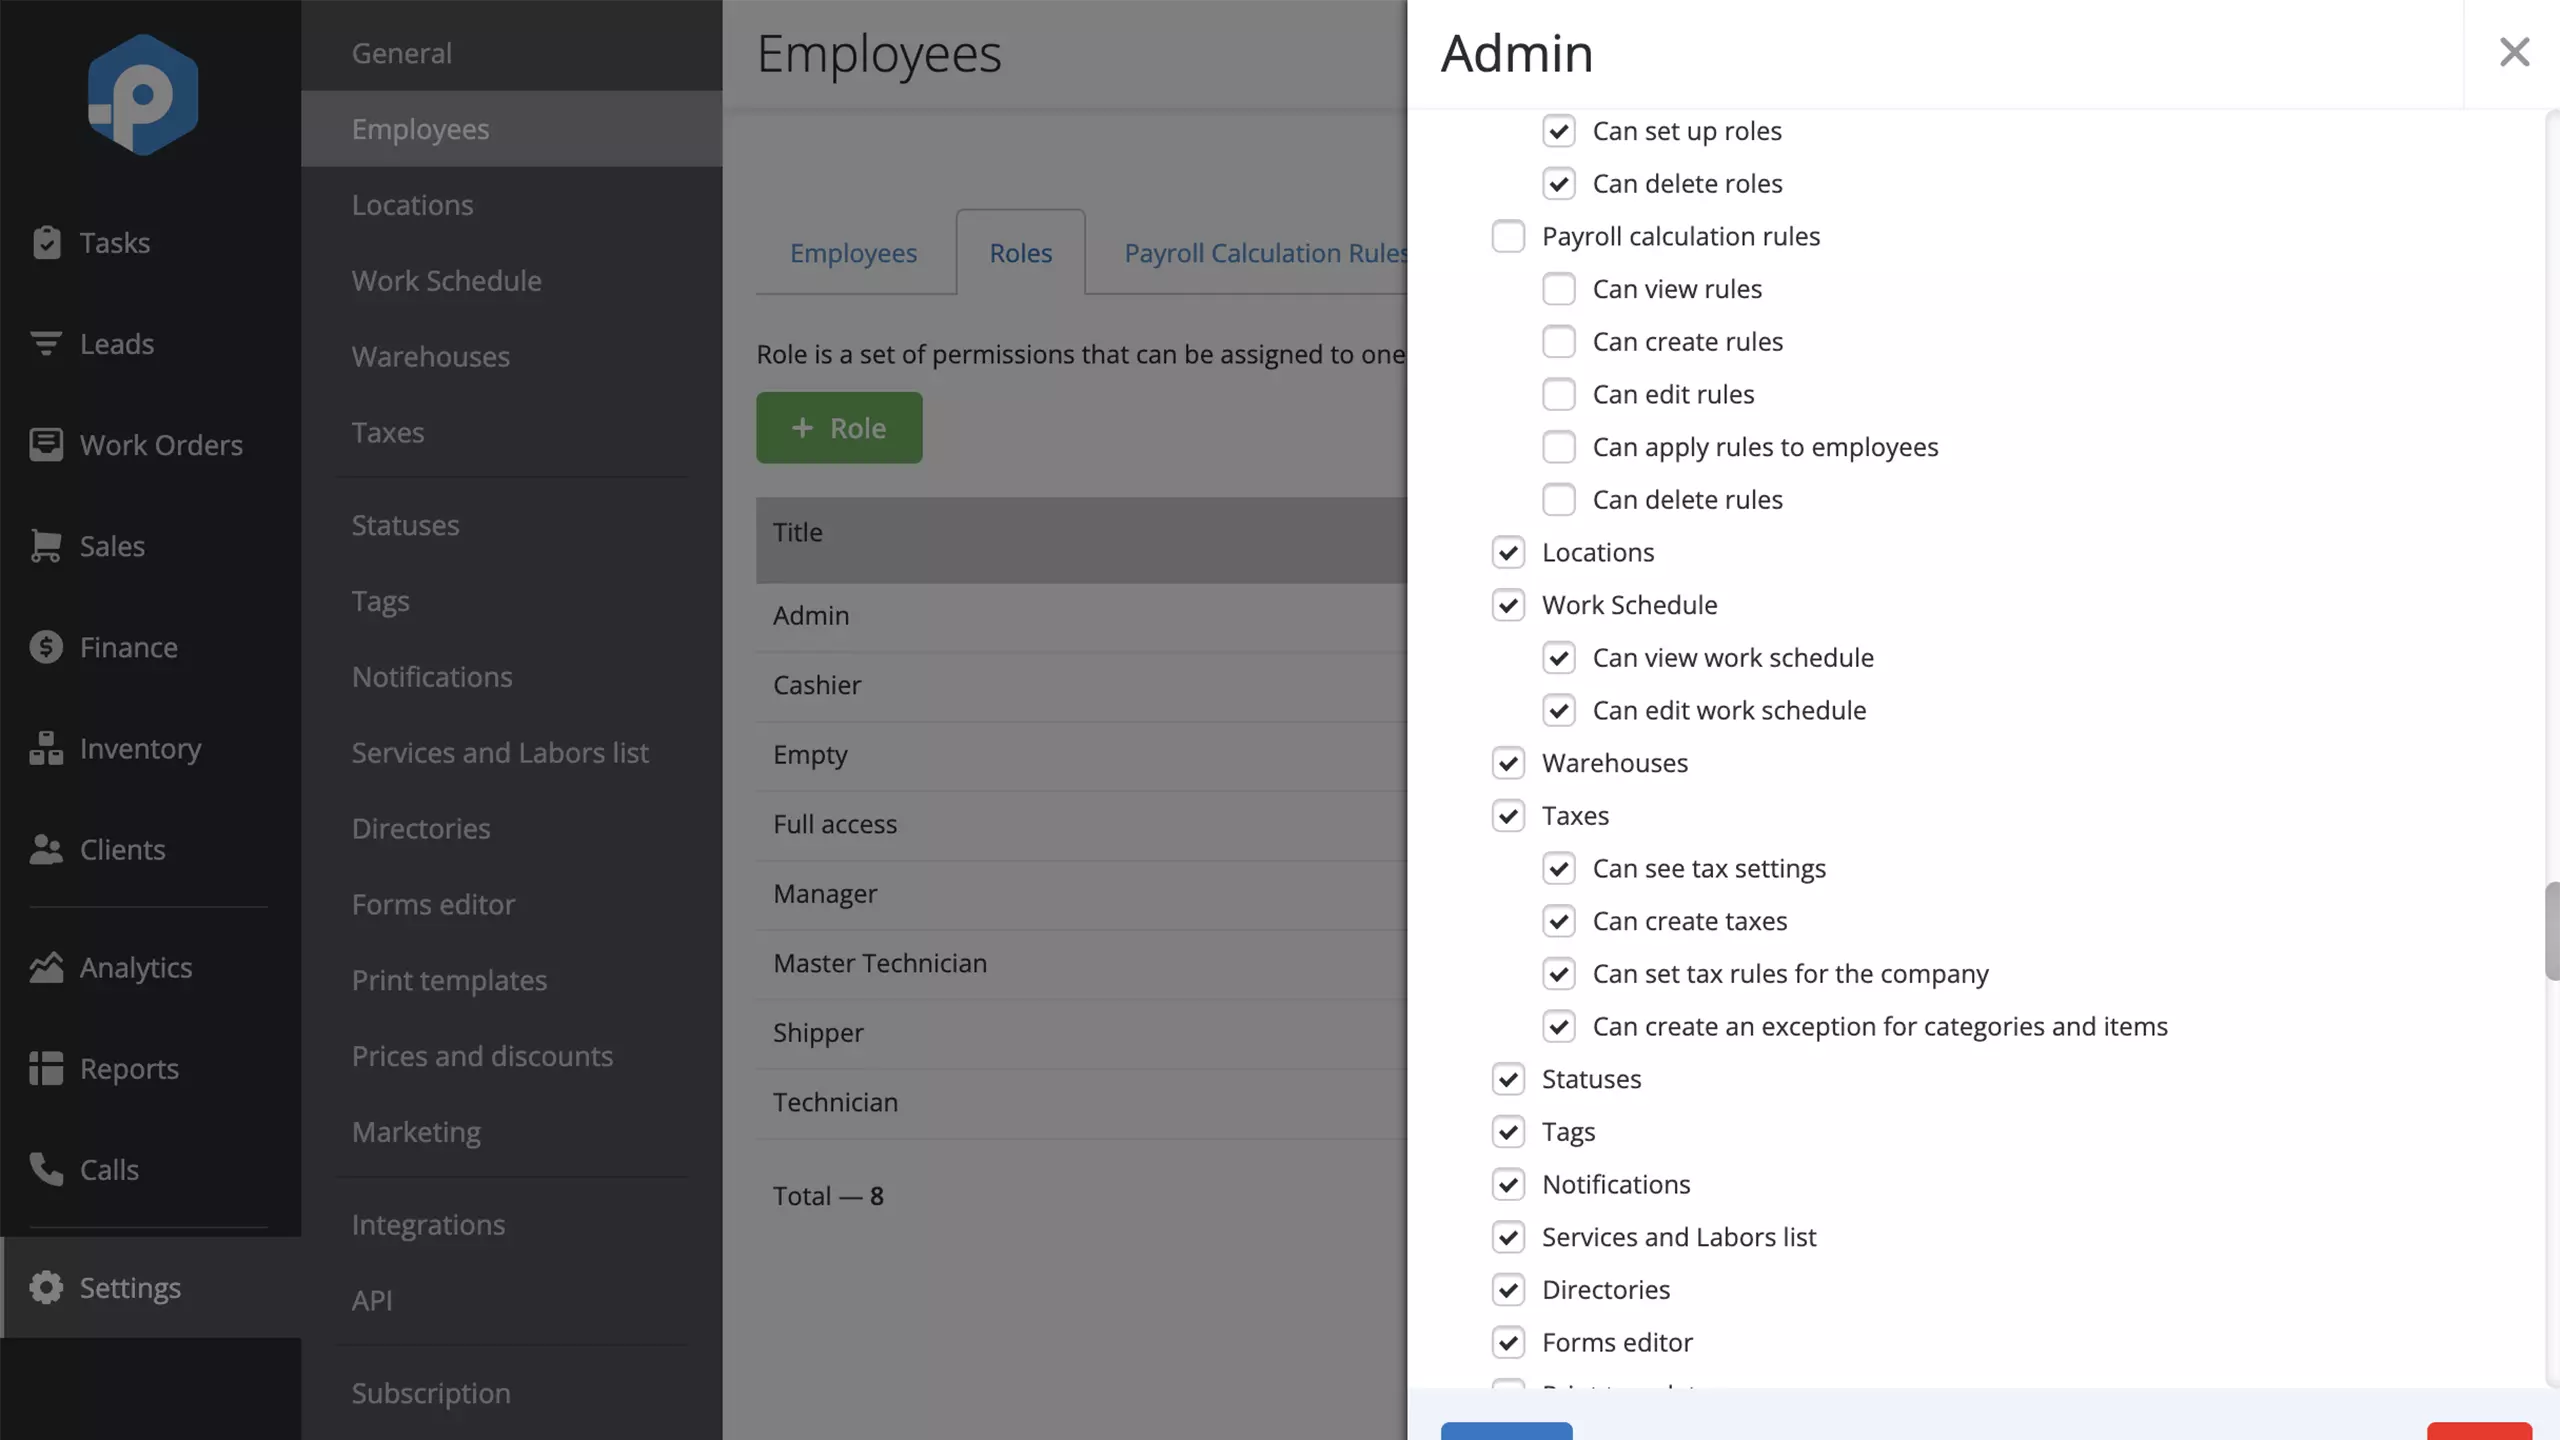
Custom Set-Up
of Employee Access
Test all RemOnline features for 7 days free of charge. No credit card required
Employee Work Schedules In a Handy Format
Accurate and Fast Calculation of Daily and Hourly Wages
Find the Best Time For Appointments
In the Work Order Scheduler, you will see employees’ working hours, including breaks and days off. This enables you to quickly schedule an appointment with a customer or create a work order that will match your team’s daily schedule.
Calculate Payroll with No Stress
Set up payroll rules for employees based on their payment system and the time worked to deliver an error-free paycheck at the end of the month.
Configure Access Rights for Employees To Enhance Security
With the advanced access configuration, only you decide who can view or edit the Work Schedules in RemOnline. By limiting access rights based on the positions and responsibilities of your workers you will avoid misunderstandings among team members as well as payroll fraud.
RemOnline is business management software for small and medium-sized service companies
Ready to test Work Schedules in RemOnline?
Sign up today and start managing your employees’ time with ease